How I created travel diary using flask and harper DB

I am a problem solver and loves to learn the new languages, likes to connect with people and share amazing ideas; )
I am someone who loves to write the things. It can be technical blog or daily schedule or my thoughts in diary. I feel writing helps us to organise our plans in better way. So same goes with my trip planning and its highlights. While travelling I have habit of noting down the details of my trip. So I thought why not make an application for this.
So lets go on ride of building this app:
Prerequisites:
- Basics of Database
- Basic understanding of Python and Flask framework
- Basic knowledge of JSON and Bootstrap
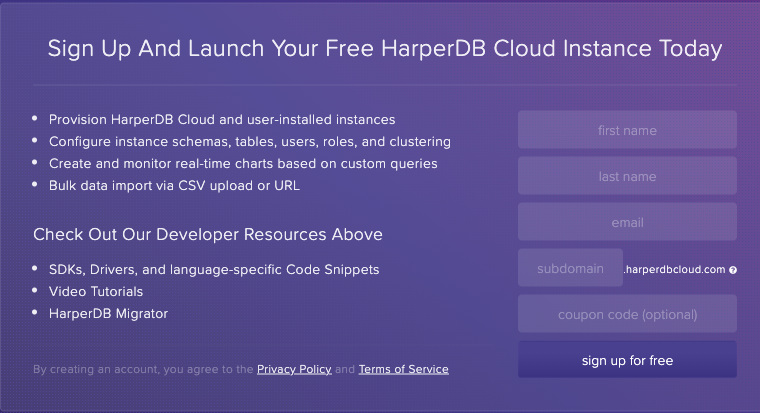
Step 1: Sign Up And Launch Your Free HarperDB Cloud Instance
- Go to the link : https://studio.harperdb.io/sign-up
- Now click on Create New HarperDB Cloud Instance to create a new database for our app.
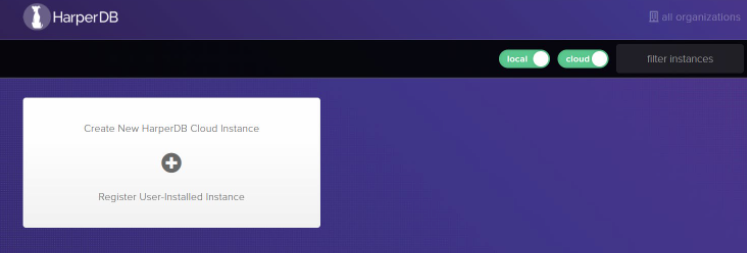
- Now we have to select instance type, I have used cloud instance here in this application
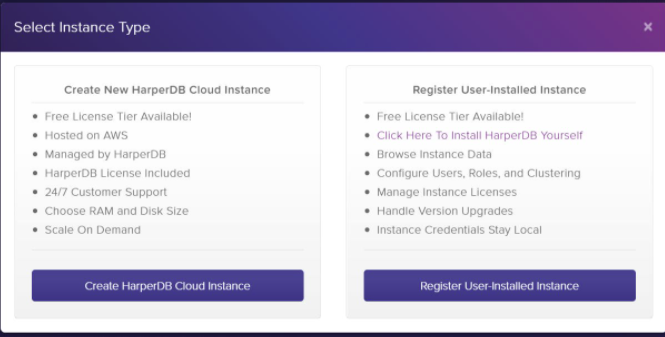
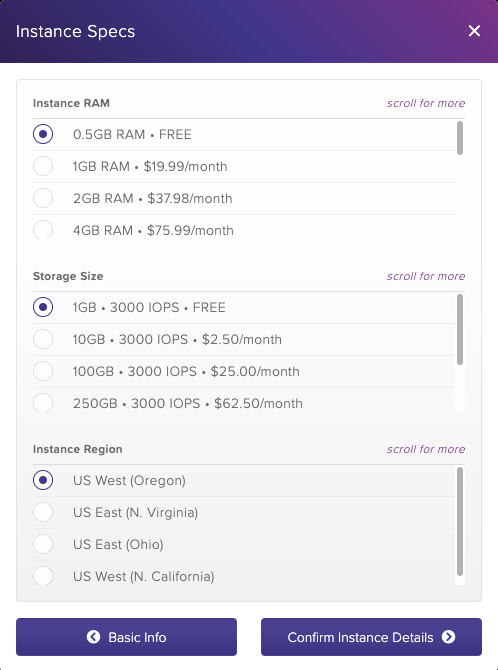
- We have to fill all the details as shown below:
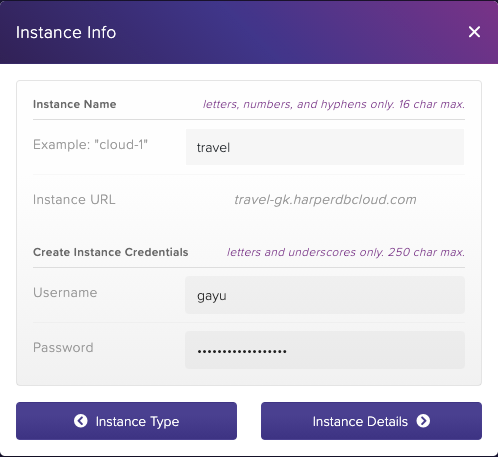
- Select the instance details, I have kept the default details:
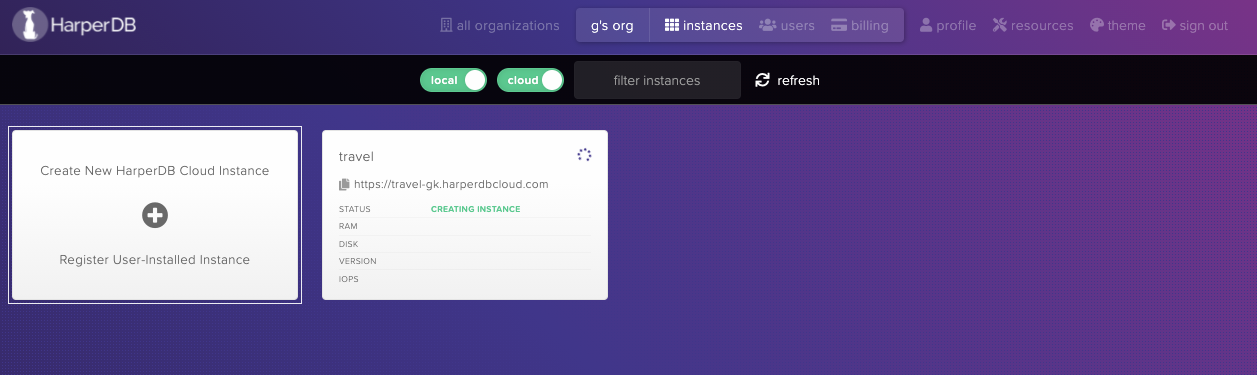
- After confirming the details we can see the cloud instance as shown below:
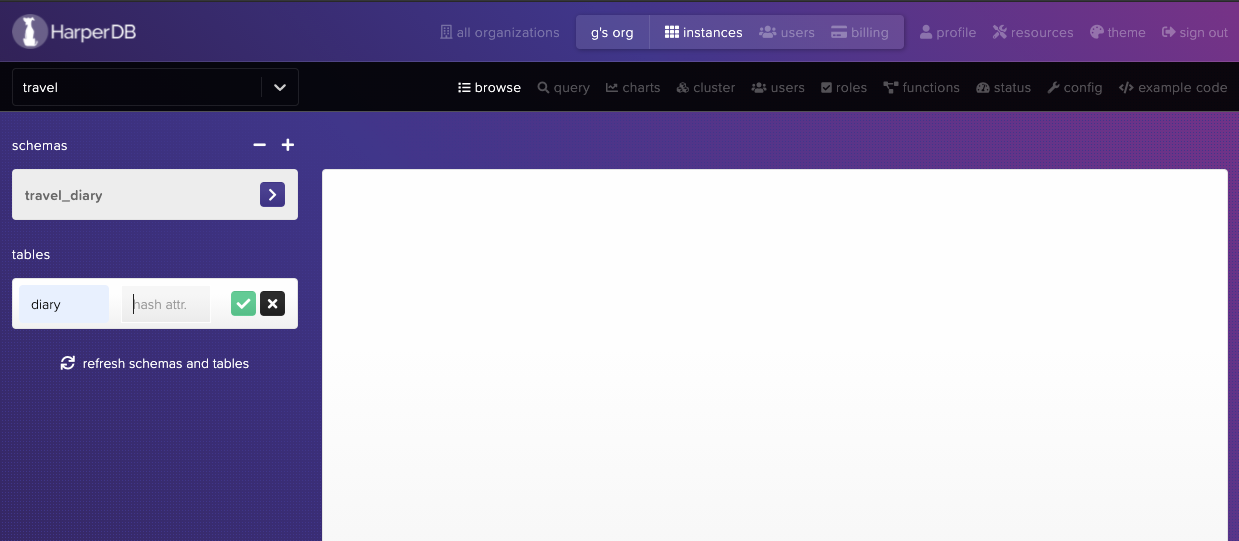
Step 2: Create schema and table
- Create schema, table and enter the value of hash attribute for the table. I have used id as hash attribute. It is nothing but the unique identifier for each record in the table.
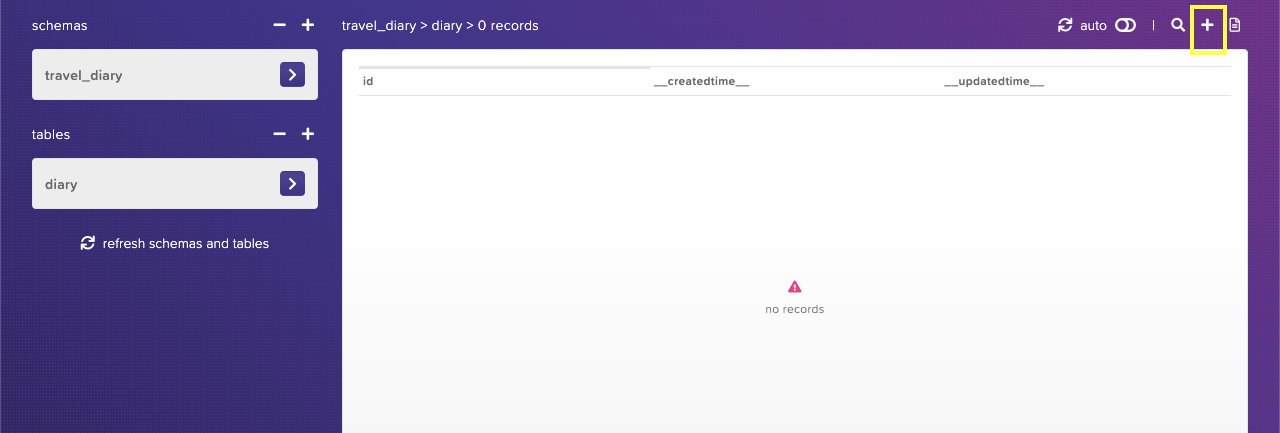
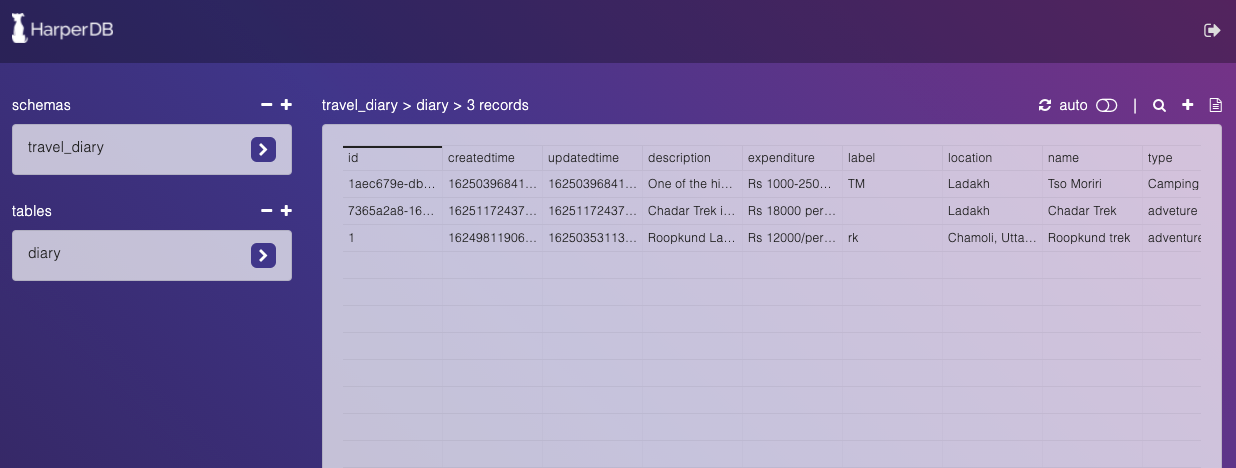
Step 3: Add records to the table
- We can add the records for place from database dashboard , click on plus sign and then add the details in JSON format
{
  description: 'One of the highest lakes in the world, Tso Moriri in Ladakh is one of the great camping sites in India. The best time to camp here is during May to September as the lake remains frozen the rest of the year. Enjoy the comforts of the tents, watch the sunrise or go trekking, this will be an experience of a lifetime, the fondest memory of traveling in India.',
  expenditure: 'Rs 1000-2500 per person per day',
  label: 'TM',
  location: 'Ladakh',
  name: 'Tso Moriri',
  type: 'Camping'
}
Note: I have shown this example for demo purpose, in actual application I have created the HTML form to submit the same above data. We will see those details in upcoming steps.
The added records will look like below:
 Also we can add list of records instead of adding each record at a time.
Step 4: Creating flask application:
- I have added the complete application code in Github . Just go to the Github repository and clone the repo and execute following commands
git clone https://github.com/gayu19/travel-diary.git          #clones the repository
cd travel-diary                    #go into that folder
python3 -m venv env         #create the virtual environment
source env/bin/activate      #activate the environment
pip3 install -r requirements.txt              #Install the requirements of the app
- Add the three environment variables in .env file as shown below, these parameters' value is available in your harperdb cloud instance:
DB_URL="your URL"
DB_USER="your user name"
DB_PASSWORD="your password"
- Now we can directly run the application but before that I would like to explain the logic behind the interconnection of the different files.
There are four important parts of flask application:
Let's see their importance one by one
- models.py
This file contains logic to connect to the harper DB. We are calling the db credentials from .env file and then using them to connect to harperdb using SDK for HarperDB .
import harperdb
import os

db = harperdb.HarperDB(
    url=os.environ["DB_URL"],
    username=os.environ["DB_USER"],
    password=os.environ["DB_PASSWORD"])
For complete code please refer https://github.com/gayu19/travel-diary/blob/main/models.py This python SDK is really easy to use and understand. More information about it is present here.
service.py This file acts as a controller in the application which contains the business logic of the application.. For complete code please visit the repository(https://github.com/gayu19/travel-diary/blob/main/service.py)
app.py This file actually runs the application and contains different routes of application. Below are the different routes present in the application.
list_places() : lists all the travelled places
create_place() : if method is POST then creates the record in harperdb and renders the thank_html with place name or else renders the form to submit the place details
get_place() : when we click on 'details' in home page we will be using this particular function
@app.route("/", methods=["GET"])
def list_places():
    all_places = DiaryService().get_all()
    return render_template("home.html", all_places=list(all_places))

@app.route("/place", methods=["GET","POST"])
def create_place():
    placedict={}
    placelist=[]
    if request.method == "POST":
        placedict["name"] = request.form.get("name")
        placedict["location"] = request.form.get("location")
        placedict["type"] = request.form.get("type1")
        placedict["expenditure"] = request.form.get("expenditure")
        placedict["description"] = request.form.get("description")
        placelist.append(placedict)
        DiaryService().create(placelist)
        return render_template("thank_you.html", place=placedict.get("name"))
    return render_template("add_place.html")


@app.route("/place/<search_value>", methods=["GET"])
def get_place(search_value):
    all_places = DiaryService().get(search_attribute="name",search_value=search_value)
    return render_template("show_place.html", all_places=list(all_places))
- Template folder
Template folder contains all the HTML templates which we have to render using flask. We are using render_template function from Flask to do the same. The important part is that I have used template inheritance here. The name itself suggests everything. We are using template inheritance to avoid unnecessary duplication of code. Mostly in the application the nav bar is common along with some other parameters. So we can define the common parameters in base HTML file and then inherit that in all other required HTML files. For example, please check both the files below:
<!-- This is example of base HTML file, the filename is base.html here-->
<!DOCTYPE html>
<html lang="en">
<head>
    <title>Template Inheritance</title>
</head>
<body>
    <h1> This heading is common in all webpages </h1>
    {% block content %}
    {% endblock %}

</body>
</html>
Below is the syntax for template inheritance
{% extends "base.html" %}
        {% block content %}
          write code here for inherited html file
        {% endblock %}
Below is the example of inherited file from base.html
{%extends "base.html" %}
{%block content%}

<h1>Welcome to inherited file</h1>

{% endblock %}
The same concept I have used in the travel-diary application. For detailed code please visit the repo
Step 5: Let's run the application
python3 app.py
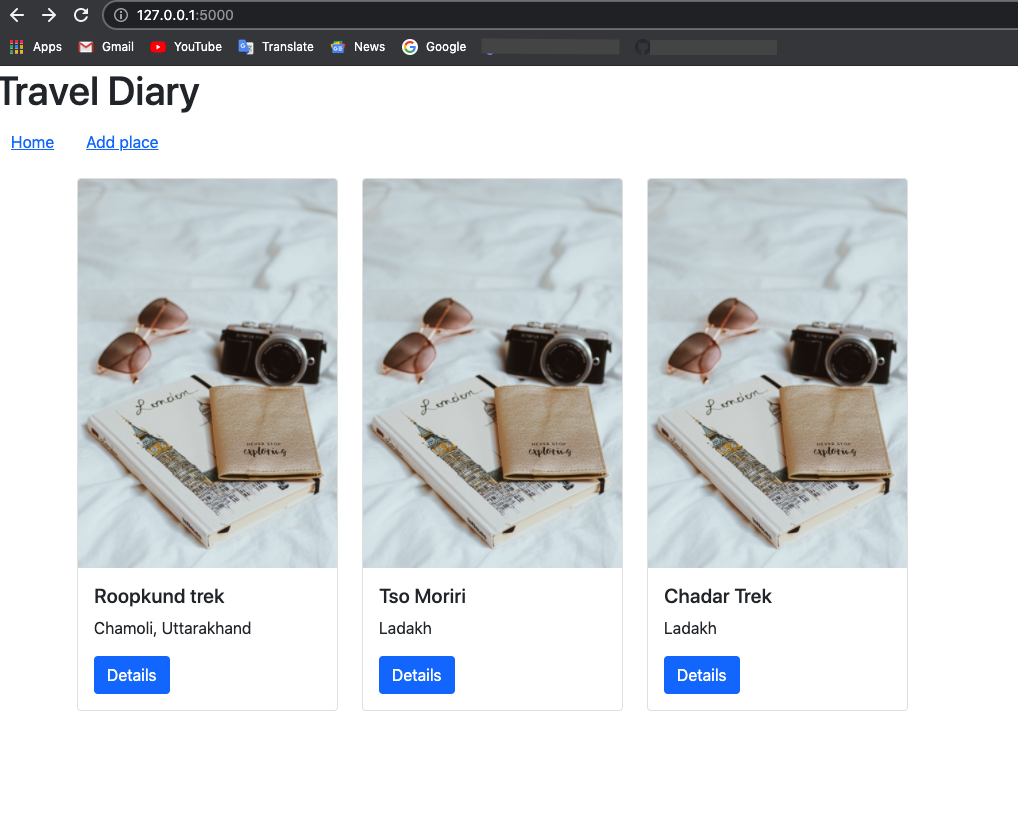
It will look something like this:
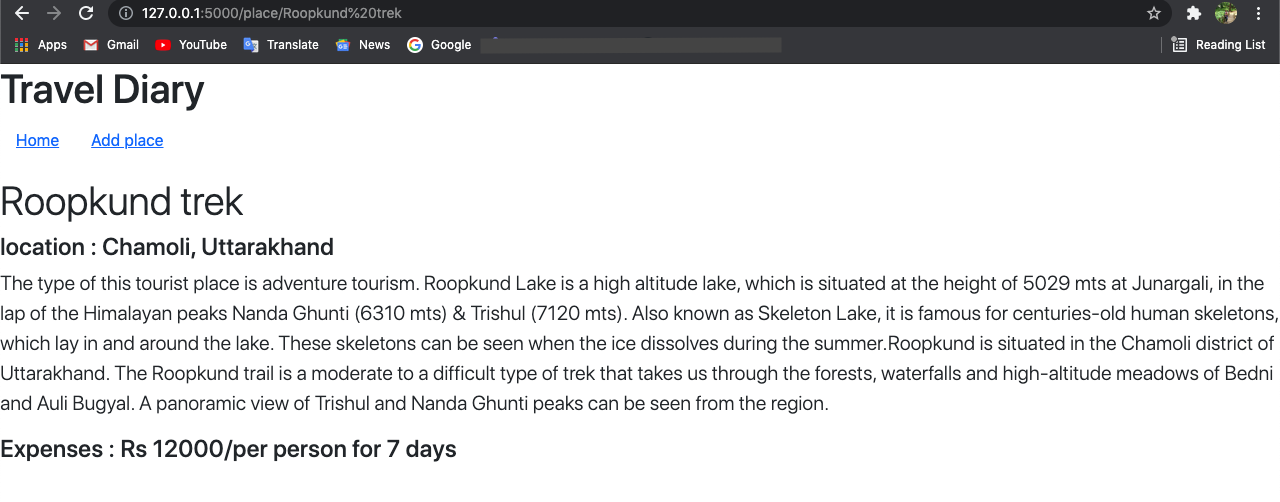
After clicking on Details you will see the details of particular place:
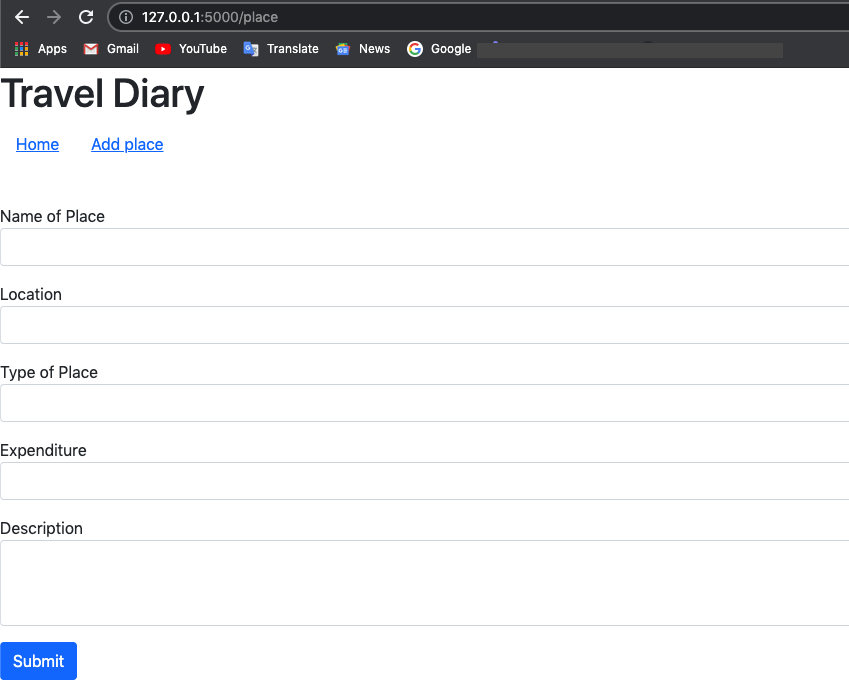
If you want to add the details for new place then click on add place in home page, it will take yo u to the form to enter the details:
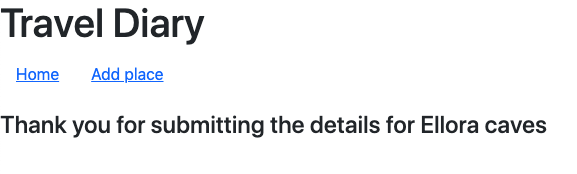
After filling all the information you will see thank you page and the data will be stored in harperdb as shown below:
What we learned:
How to use harperdb python SDK to connect to the database
How we can distribute the functionalities among different files in Flask app
How to use template inheritance in flask
That's it guys for this application. I found harperdb very easy to use while developing this application also I really liked Victoria's article curate-top-programming-blogs-with-react-and-harperdb. She have mentioned some other features of harper db in her article and also listed some other articles related to harperdb. Do check that out for clearing more concepts.
Below are the references I have used:
https://www.geeksforgeeks.org/template-inheritance-in-flask/
https://harperdb.io/developers/developer-examples/python-and-ml-model/


